
Overview
A guide to setting up an L2TP/IPSec VPN server on a Synology NAS and connecting from outside.
Steps
1. Synology VPN Server Configuration
Install the VPN Server package from the DSM Package Center, then open VPN Server and select L2TP/IPSec from the left menu.
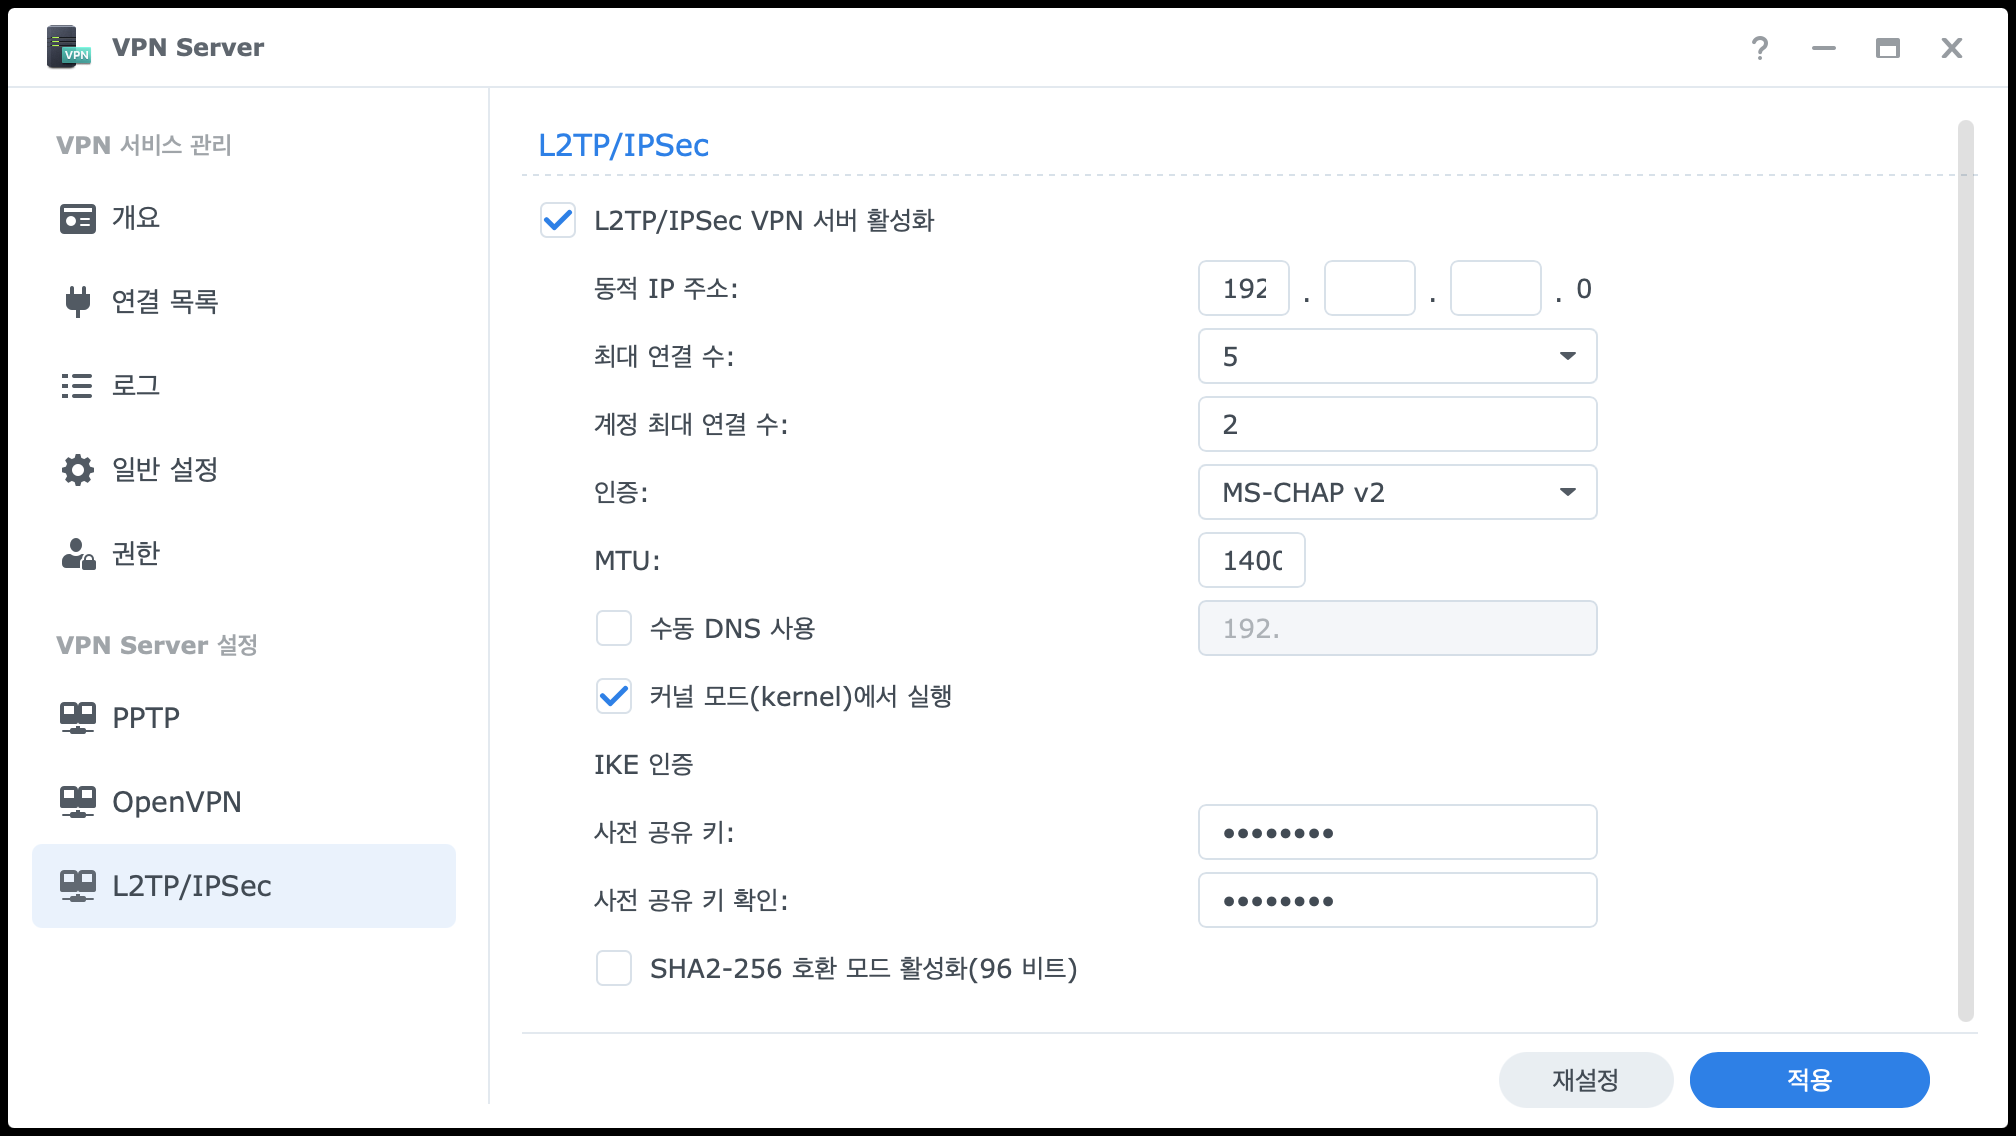
Here is what each setting does:
| Setting | Description |
|---|---|
| Enable L2TP/IPSec VPN server | Checkbox to enable the L2TP/IPSec VPN service. |
| Dynamic IP address | Sets the virtual IP range assigned to VPN clients. For example, setting 192.168.1.0 means connected clients receive IPs in the 192.168.1.x range. Use a range that does not conflict with your internal network. |
| Maximum connection number | The maximum number of clients that can connect to the VPN simultaneously. |
| Maximum number of connections with same account | The maximum number of simultaneous connections allowed per account. |
| Authentication | Selects the client authentication method. MS-CHAP v2 is recommended as it provides encrypted authentication. |
| MTU | Maximum Transmission Unit — the maximum packet size for a single transmission. The default value of 1400 works well in most cases. |
| Manual DNS | Allows you to manually specify the DNS server used during VPN connections. If unchecked, it follows the Synology DNS settings. |
| Run in kernel mode | Processes VPN at the kernel level for improved performance. Enabling this is recommended. |
| Pre-shared key | The shared key used for IPSec encryption. Clients must enter this key when connecting to the VPN. Set a sufficiently complex value. |
| Enable SHA2-256 compatible mode (96 bit) | A compatibility option for some older clients. Generally left disabled. |
Click Apply after completing the configuration.
2. Synology Firewall Settings
Edit the firewall rules in DSM Control Panel > Security > Firewall. You need to allow VPN Server related ports in the built-in application selection screen.

The following two entries are required for L2TP/IPSec VPN:
| Entry | Port | Description |
|---|---|---|
| VPN Server (L2TP/IPSec) | 1701 | L2TP tunneling port. |
| VPN Server (L2TP/IPSec) | 500, 4500 | IKE (500) and NAT Traversal (4500) ports used by IPSec. |
Check both entries and click OK to add them to the firewall rules.
3. Router Port Forwarding
To access the VPN server from outside, you need to forward the relevant ports to the NAS internal IP on your router.

| Setting | Value |
|---|---|
| Service name | L2TP / IPSec VPN Server (for identification) |
| External port | 500, 1701, 4500 |
| Internal port | (same as external port) |
| Internal IP address | Internal IP of your Synology NAS (e.g., 192.168.x.x) |
| Protocol | UDP |
L2TP/IPSec uses the UDP protocol, so make sure to set it to UDP.
4. Domain Setup
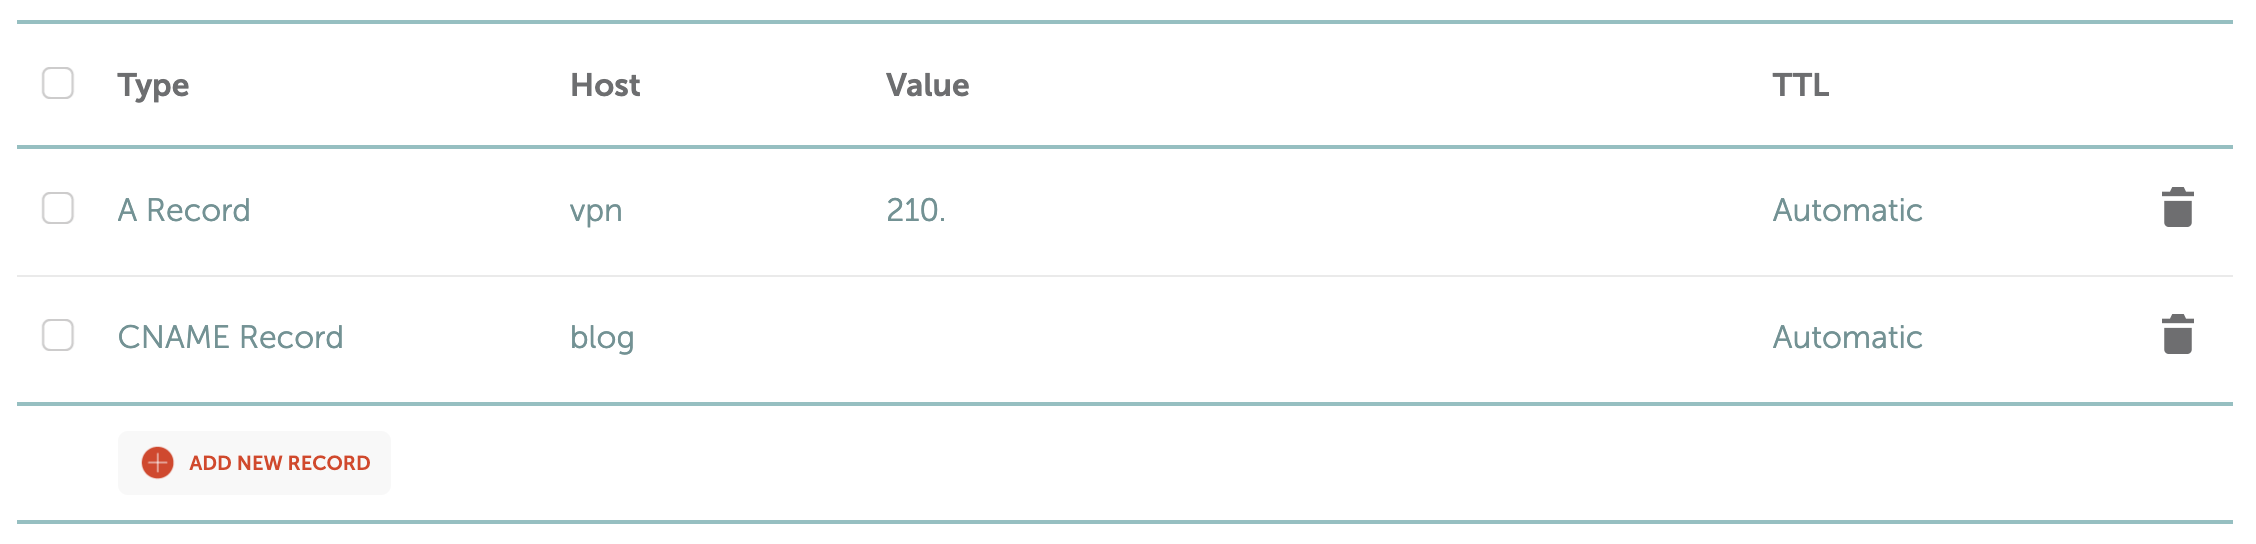
Using a domain instead of a public IP address that may change is more convenient. Add a record for VPN access in your DNS management panel.
| Type | Host | Value | Description |
|---|---|---|---|
| A Record | vpn | Public IP address (e.g., 210.x.x.x) |
Allows connecting to the VPN server via vpn.yourdomain.com. |
Enter vpn as the Host for the A Record to access it as vpn.yourdomain.com. Enter your router’s public IP address as the Value.
If you have a dynamic public IP, it is recommended to use Synology’s DDNS feature or a separate DDNS service to automatically update the IP when it changes.
5. iPhone Configuration
On your iPhone, go to Settings > General > VPN & Device Management > VPN > Add VPN Configuration.
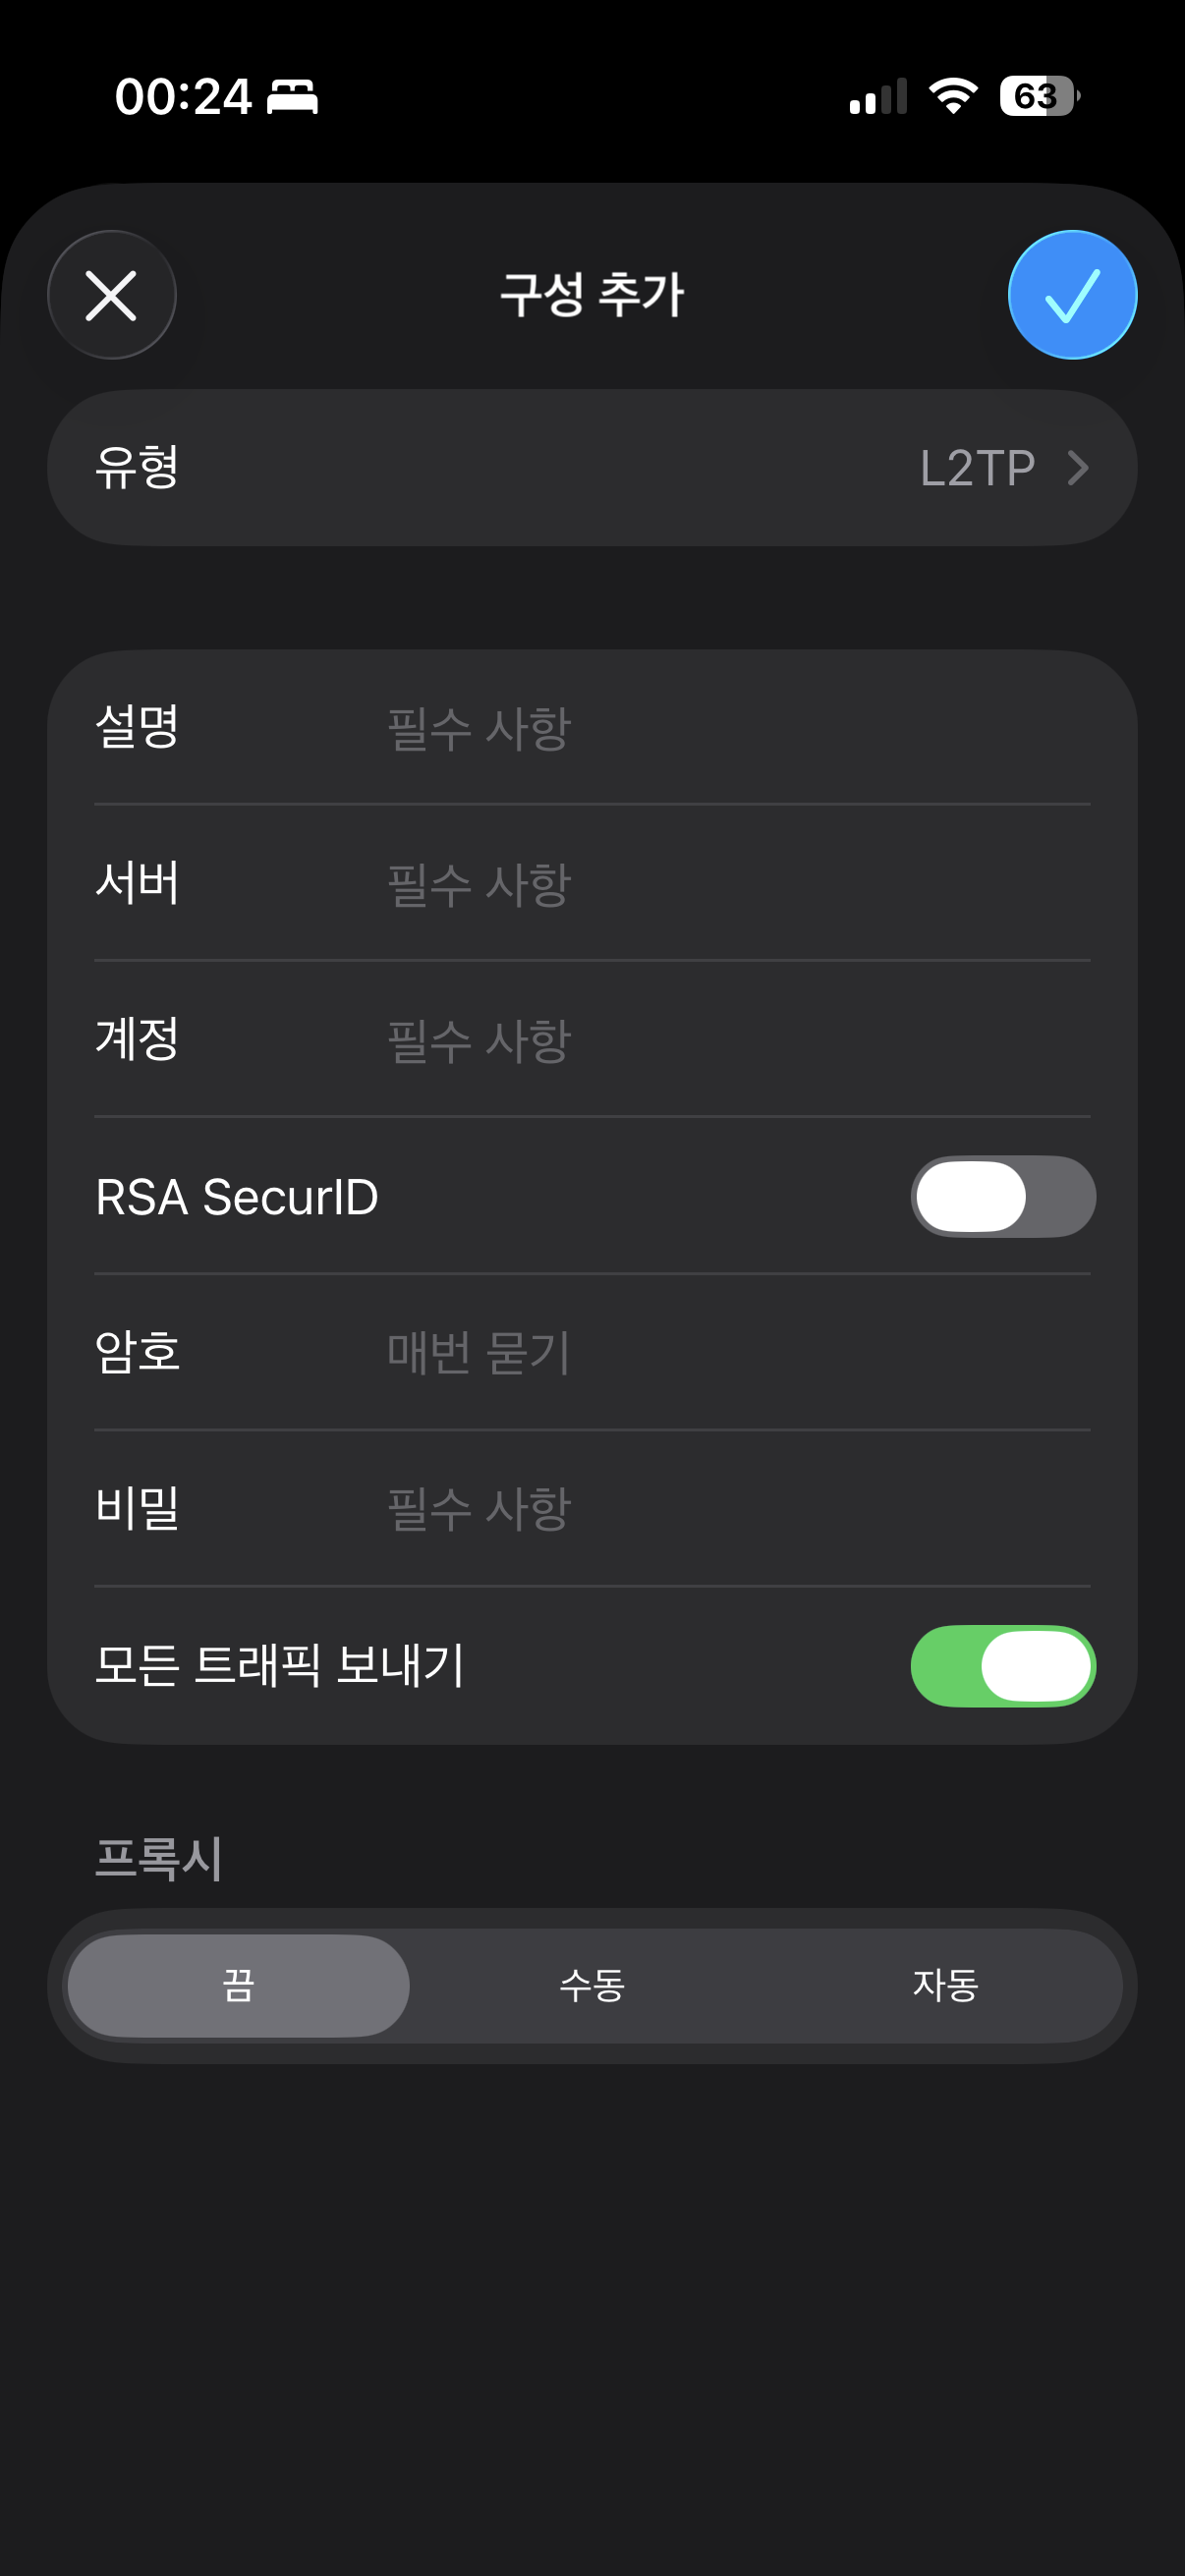
Select L2TP as the type and fill in each field:
| Field | Description |
|---|---|
| Type | Select L2TP. |
| Description | The name for this VPN connection. Enter any name that is easy to identify. (e.g., Home) |
| Server | Enter the VPN server address. If you set up a domain, enter vpn.yourdomain.com. |
| Account | Enter your Synology DSM username. |
| RSA SecurID | Not used — leave this disabled. |
| Password | Enter the password for your DSM user account. |
| Secret | Enter the pre-shared key configured on the VPN server. |
| Send All Traffic | When enabled, all internet traffic is routed through the VPN connection. Enabling this is recommended for security. |
After completing the settings, tap the checkmark button in the top right to save, and you can connect to the VPN.


Leave a comment